10 Essential Spinning Tools Every Spinner Needs

If you are new to spinning, welcome. You are about to discover one of the most satisfying fibre crafts out there. Turning fibre into yarn with your own hands feels a little bit like magic. One moment you are holding fluff, the next you are winding a skein of yarn that you created from scratch.
While spinning can be simple, having the right tools makes a real difference. The right equipment will help you learn faster, avoid frustration, and actually enjoy the process.
If you are just starting and wondering what you truly need, this guide will walk you through the 10 essential spinning tools every beginner should have.
Let's get started.
1. Spinning Wheel or Drop Spindle

The very first decision you will make as a spinner is whether to start with a spinning wheel or a drop spindle.
Drop Spindle
A drop spindle is the simplest spinning tool. It is lightweight, portable, and affordable. You get the spindle in motion and draft fibre with your hands while the twist accumulates and the spindle hangs below.
Why spinners love it:
- Low cost
- Easy to transport and use almost anywhere
- Great for learning drafting and twist control
- No large investment required
Spinning Wheel
A spinning wheel allows you to spin continuously while seated. You treadle with your feet, which turns the wheel and flyer mechanism, which adds twist to the fibre while your hands draft.
Popular beginner-friendly wheels include models from Ashford and Louet. You can read more about choosing a spinning wheel in our guide: “Choosing a Spinning Wheel for Your Fibre Arts Journey”.
Wheels are typically faster than spindles, easier on your arms, and can aid in the production of a more consistent yarn. If you are unsure which to start with, many spinners begin with a drop spindle to understand the mechanics of twist and drafting, then move on to a wheel once they are hooked.
2. Fibre to Spin
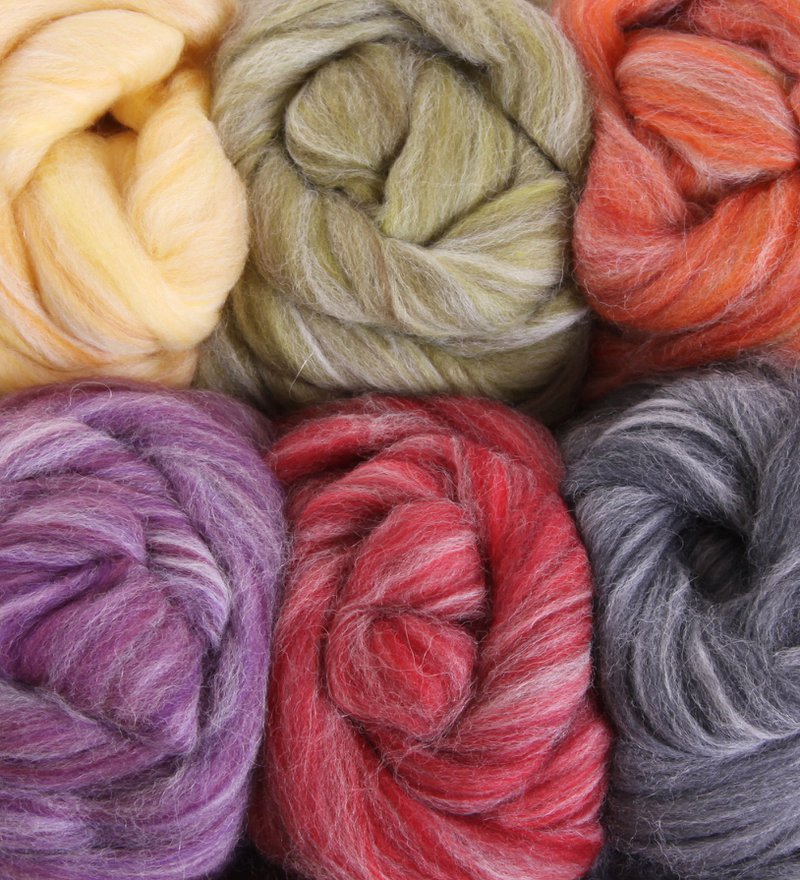
You cannot spin without fibre. But not all fibre is beginner-friendly.
Best Fibre for Beginners
Start with wool. Specifically prepared top or roving, and a medium-fine wool such as Corriedale. It is widely considered the easiest wool to learn on, with a staple length of around 3 to 5 inches, a nice crimp that helps keep the yarn together, and enough grip so the fibre does not slip through your fingers while you are learning.
Avoid slippery fibres like silk or bamboo, or short-staple fibres such as cotton at the beginning. They can be beautiful, but they are much harder to control.
When choosing fibre, look for:
- Soft, open preparation
- Even texture
- Clean, well-prepared top or roving
The easier the fibre drafts, the more confident you will feel.
3. Extra Bobbins
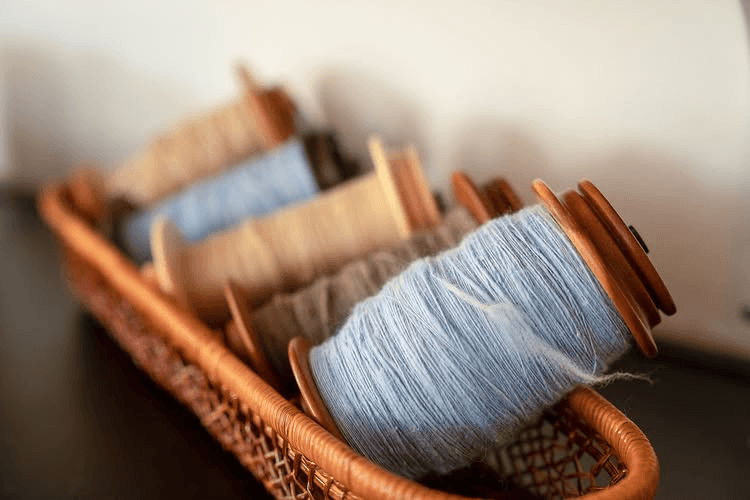
If you are using a spinning wheel, you will almost certainly want more bobbins than your wheel comes with.
Each bobbin holds one single of yarn. While you can wind singles into a cake to access both ends for plying, this can get messy. You can also chain ply from a single bobbin, but this limits you to a 3-ply construction, and the characteristics of chain ply may not suit every project. Generally, if you plan to ply two or more singles together, you will need at least two full bobbins before you can start plying, plus a third to ply onto.
As a beginner, aim for at least 3 to 4 bobbins. Most wheels with standard-sized bobbins come with 3, while jumbo wheels tend to come supplied with one. Check what your wheel is packaged with and add bobbins before purchasing to avoid frustration and save on shipping costs. You will fill them faster than you expect.
4. Lazy Kate
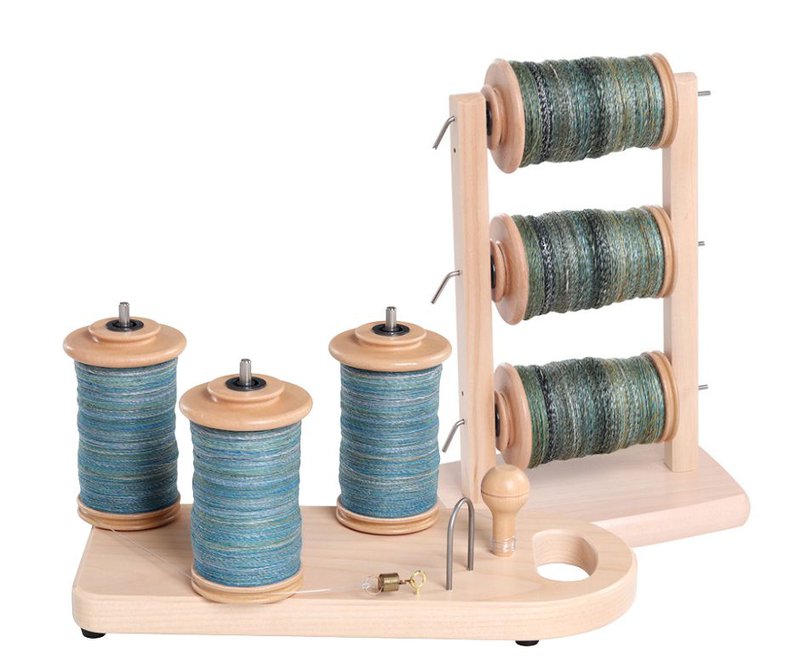
A lazy kate holds your bobbins while you ply yarn. It allows the singles to unwind smoothly and evenly.
There are two main types: tensioned and untensioned lazy kates.
For many spinners, a tensioned lazy kate is preferred. It prevents bobbins from spinning too freely and tangling your singles.
Without a lazy kate, plying becomes awkward and frustrating. With one, it feels controlled and satisfying.
5. Niddy Noddy
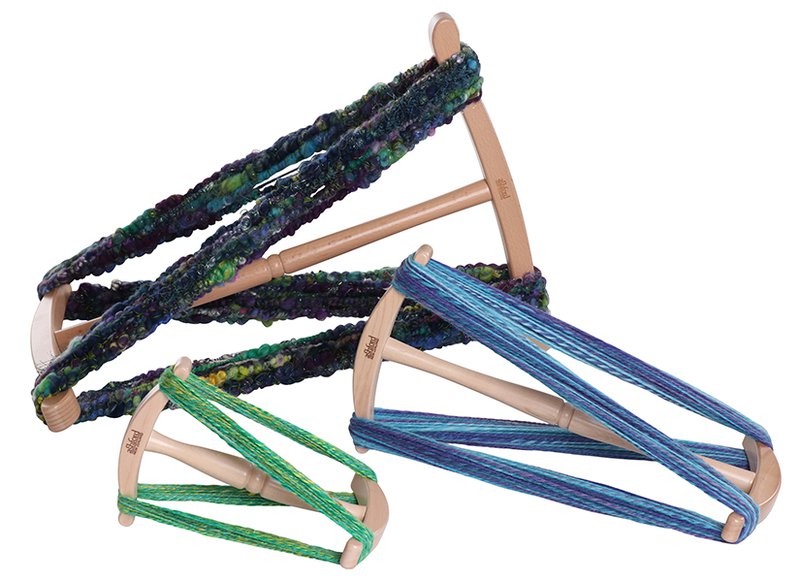
A niddy noddy is used to wind your finished yarn into a skein.
It helps you create a neat skein, measure yardage, and prepare yarn for washing and finishing.
Most niddy noddies come in different sizes. To calculate yardage, you count the number of wraps and multiply by the circumference of your niddy noddy. Keep in mind that yarn will likely shrink a little once it comes off the tool and is washed, so treat any measurement as an approximation until the skein is dry.
This is the tool that turns your freshly spun yarn into something that looks beautifully finished and ready to use.
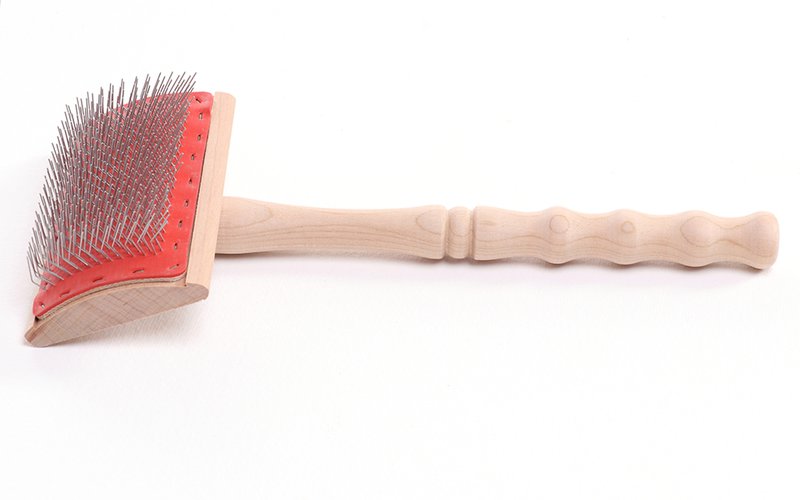
6. Hand Carders or a Blending Board
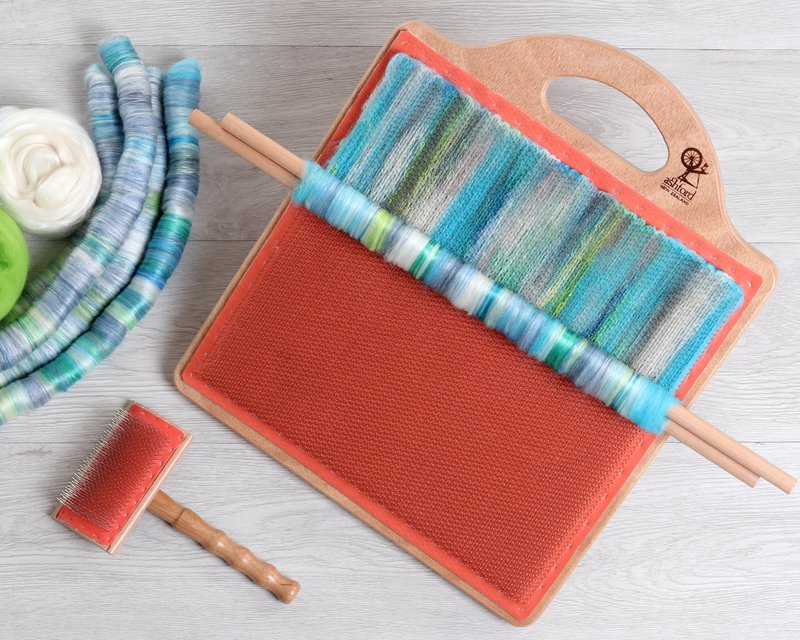
While you can buy prepared fibre, eventually you may want to blend colours or prepare fibre yourself.
Hand carders allow you to open up washed fleece, blend colours, create rolags, and prepare fibre from raw wool.
Blending boards are wonderful if you enjoy creating artistic colour gradients, mixing fibres like wool and silk, or designing custom spinning preparations.
For beginners, this tool is not required right away. But if you enjoy experimenting and playing with fibre, it quickly becomes indispensable.
7. Wool Comb or Flick Carder
If you are working with raw fleece, you will need something to prepare the locks.
A flick carder is ideal for opening lock tips, removing debris, and preparing small amounts for spinning.
Wool combs are better for aligning fibres for worsted spinning, removing short fibres, and producing smooth top from fleece.
As a beginner, a flick carder is usually enough. It is simple and easy to manage.
8. Orifice Hook
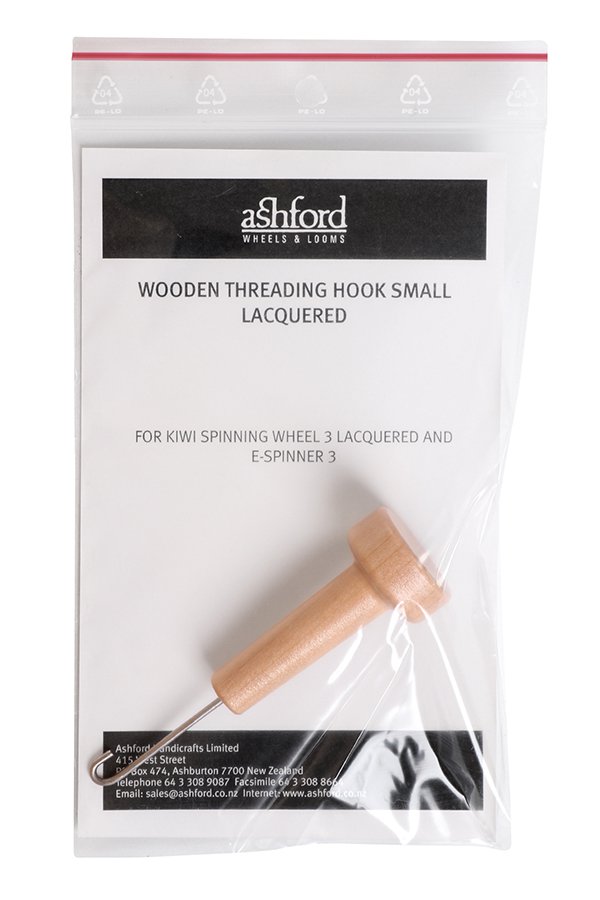
This small tool might look insignificant, but it saves a lot of frustration.
An orifice hook is used to thread the yarn through the flyer, retrieve broken yarn ends, and adjust yarn position on hooks.
Many spinning wheels include one, but it is wise to keep a spare. They are small, easy to misplace, and essential when your yarn breaks mid-spin.
9. Yarn Gauge
Regardless of skill level, your yarn thickness may vary or change throughout a project. It is a completely normal part of spinning and is influenced by memory, mood and distractions.
A yarn gauge or WPI (wraps per inch) tool helps you keep on track by allowing you to measure yarn thickness, track consistency, match commercial yarn weights, and plan projects accurately.
Simply wrap your yarn around the gauge and count how many wraps fit into one inch. This tells you your yarn weight category.
This small tool builds confidence because it gives you measurable progress.
10. Yarn Finishing Tools

Spinning does not end when the yarn leaves the wheel. Finishing your yarn sets the twist, balances the ply, softens the fibre, and transforms it from wiry to something balanced and ready to use.
Basic finishing tools include a basin or sink, wool wash, towels, and a place to hang skeins.
Many beginners skip proper finishing and wonder why their yarn feels stiff or why their project changes after it has been wet finished. Do not skip this step. It is the final polish.
Bonus: Tools You Do Not Need Immediately
When you first enter the spinning world, it is easy to feel overwhelmed by all the equipment available.
You do not need an electric spinner right away (unless you would prefer one to a traditional wheel or spindle), every fibre preparation tool available, exotic fibres, or a large fleece stash.
Start simple. Master drafting and twist. Then expand your toolkit as your skills grow.
How to Choose the Right Tools as a Beginner
If you are just getting started, here is a good order of priorities:
- Start with a drop spindle or an entry-level spinning wheel
- Choose easy-to-draft wool like Corriedale
- Add bobbins and a lazy kate once you want to ply
- Invest in measuring and finishing tools early
- Explore fibre prep tools once you are comfortable with drafting
Spinning is not about collecting tools. It is about learning how fibre behaves under twist. The tools simply support that learning.
Final Thoughts: Build Confidence, Not Just a Toolkit
Spinning can feel awkward at first. Your yarn may be thick in places and thin in others. It may overspin. It may drift apart.
That is completely normal.
Every experienced spinner started exactly where you are now.
The right tools will reduce frustration, help you understand twist, improve consistency, make plying smoother, and help you measure progress.
But the most essential tool is patience with yourself.
Start with the basics. Practice regularly. Play with fibre. Ask questions. And most importantly, enjoy the rhythm of treadling or the gentle whir of a spindle spinning in the air.
Before long, you will look at a skein of yarn in your hands and think, I made this.
And that feeling never gets old.
Share this article on your favorite platform:

1 comment
Hi Nicky
This is an excellent informative article.
I’m from Shoalhaven Heads NSW and after wandering through the Berry Markets with my daughter we met some lovely ladies from Berry Spinners and Weavers exhibiting their creations in the nearby School of Arts building. My daughter loves to crochet and I’ve been knitting since I was in primary school.
I was invited to attend a Spinners and Weavers meeting and was encouraged to try a drop spindle. It was a little tricky at first but I found learning to spin the yarn relaxing and meditative.
In the following weeks I borrowed a 25cm rigid heddle loom and with the help of the encouraging ladies, excited to introduce me to weaving, we set up the loom and I took it home and experimented with different coloured yarn. The following week I made another scarf using pink, purple, white and red yarn and fell in love with weaving.
Berry Spinners and Weavers had an old Ashford Traditional spinning wheel for sale that I’ve purchased, and have been enjoying learning to spin although my yarn does have a great deal of “character” and is definitely unique.
I love the soft feel of the wool yarn as I create, and now my time is taken researching sources of wool, equipment and different creation ideas.
It’s wonderful to find a community who share a love of fibre arts and enjoy creating something new.
Your website is the best one I’ve found on the internet combining information, equipment and a personal sense of community. Thank you for your efforts as it must have been a challenging experience.
Kind regards,
Kimberlie Smalle